
How to Transfer QuickBooks Desktop to a New Computer: Step-by-Step Guide
A complete guide to moving QuickBooks Desktop — your license, company file, and all data — from an old computer to a new one without losing anything or starting over.
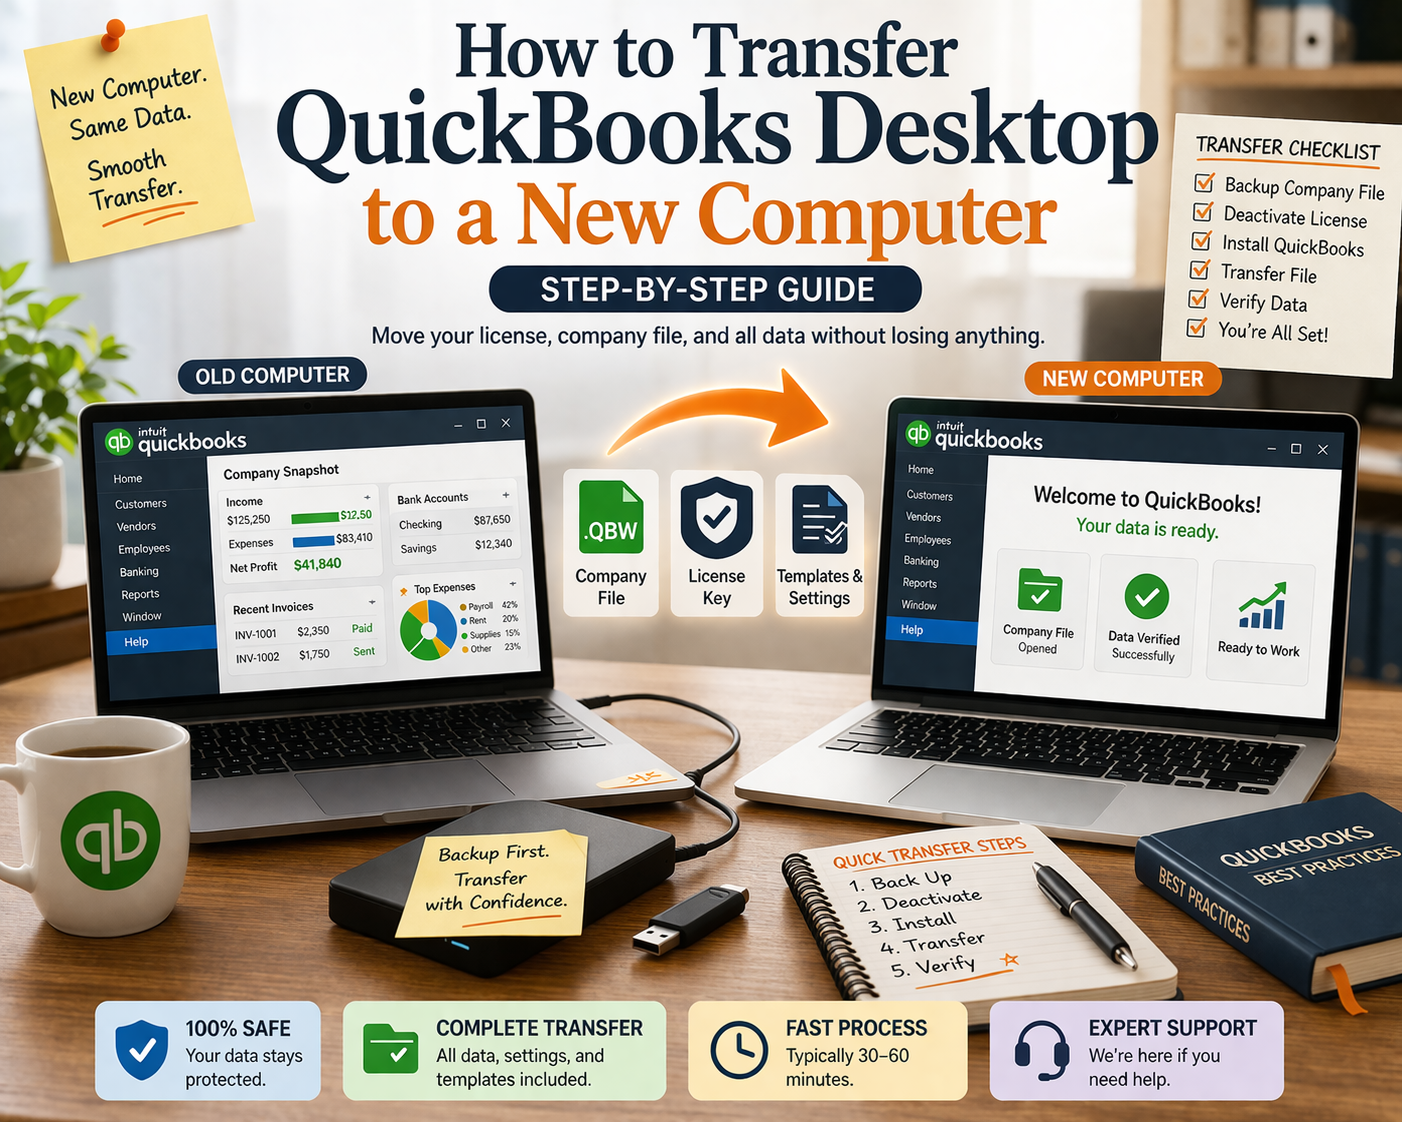
Getting a new computer is exciting. Moving your QuickBooks Desktop installation to it can feel daunting — especially if you have years of company data you cannot afford to lose. The good news is that transferring QuickBooks Desktop to a new computer is a well-documented process that, done correctly, preserves every transaction, report template, memorized transaction, and preference you have set up.
This guide walks you through the entire transfer process step by step, covering both the license transfer and the company file migration.
📋 Table of Contents
- Overview: What Needs to Transfer
- Step 1: Back Up Your Company File on the Old Computer
- Step 2: Deactivate QuickBooks on the Old Computer
- Step 3: Install QuickBooks on the New Computer
- Step 4: Transfer Your Company File
- Step 5: Restore and Verify Your Data
- Step 6: Transfer Templates and Additional Files
- Troubleshooting Common Transfer Issues
1. Overview: What Needs to Transfer
A complete QuickBooks Desktop transfer involves moving four things from your old computer to the new one:
| Item | What It Is | How to Transfer |
|---|---|---|
| License key | Your 16-digit activation key | Deactivate on old PC, reactivate on new PC |
| Company file (.QBW) | All your accounting data | Backup + restore, or direct file copy |
| QuickBooks installer | The software itself | Download fresh from Intuit’s servers |
| Templates and letters | Custom invoice and form templates | Manual copy from old PC |
⚠️ Do not skip the deactivation step. QuickBooks Desktop perpetual licenses have an installation limit (typically 2–3 activations). If you do not deactivate on the old computer first and it breaks or is discarded, you may need to call Intuit to reset your activation count. Always deactivate first if the old computer is still functional.
Step 1: Back Up Your Company File on the Old Computer
This is the most critical step. Create a full backup before doing anything else.
Open QuickBooks on the old computer
Log in with your admin credentials. Make sure no other users are logged into the company file if you are in multi-user mode.
Go to File → Back Up Company → Create Local Backup
Select Local Backup, then choose a destination. Save the backup to an external USB drive, an external hard drive, or a cloud storage folder (Dropbox, Google Drive, OneDrive). The backup file will have a .QBB extension.
Verify the backup completed successfully
QuickBooks will show a confirmation message when the backup completes. Check the destination folder to confirm the .QBB file is present and has a recent modification date and a file size larger than zero.
Create a second copy
Copy the .QBB file to at least one additional location — email it to yourself, upload it to a second cloud service, or copy it to a second USB drive. Never rely on a single backup copy during a major transfer.
Step 2: Deactivate QuickBooks on the Old Computer
Open QuickBooks on the old computer
Close any open company files first (File → Close Company).
Go to Help → Activate QuickBooks Desktop
Even though the product is already activated, this menu path opens the activation management screen.
Select “Deactivate” or note your license information
In some versions of QuickBooks, there is an explicit deactivate button. In others, you simply note your license key (Help → About QuickBooks) and proceed. The activation is released when you uninstall.
Uninstall QuickBooks from the old computer
Go to Windows Settings → Apps → find QuickBooks Desktop → Uninstall. This releases the activation slot so you can use it on the new computer.
Step 3: Install QuickBooks on the New Computer
Download the official installer
Use the download link from your original ParagonSoftwares delivery email, or log into your Intuit account to access the download. Always download from the official Intuit source.
Right-click → Run as Administrator
Right-click the downloaded .exe file and select Run as Administrator. This ensures the installation has the permissions it needs.
Complete the installation wizard
Follow the installation prompts. Choose Express installation for a single-user setup. The installation takes 5–15 minutes depending on your computer speed.
Activate with your license key
When QuickBooks launches for the first time, enter your 16-digit license key and 6-digit product number. An internet connection is required for activation. Once activated, the software works offline.
Step 4: Transfer Your Company File
You have two options for moving your company file:
Option A: Restore from Backup (Recommended)
Copy the .QBB backup file to the new computer
Copy from your USB drive, external hard drive, or download from your cloud storage location.
In QuickBooks: File → Open or Restore Company → Restore a Backup Copy
Select Local Backup, browse to the .QBB file, and choose a destination folder for the restored company file.
Option B: Direct File Copy
If you want to copy the live .QBW file directly (not from a backup), close QuickBooks first on both computers, copy the .QBW file to the new computer, then open it in QuickBooks using File → Open or Restore Company → Open a Company File.
Step 5: Restore and Verify Your Data
Open the company file on the new computer
QuickBooks may prompt you to update the company file to the new version. This is normal — click OK and allow it. Keep the original backup as a safety net.
Run a data verification check
Go to File → Utilities → Verify Data. QuickBooks will check the company file for any data integrity issues. If it finds problems, run File → Utilities → Rebuild Data to fix them.
Check key data points
Spot-check your data: open the most recent bank reconciliation, check the Trial Balance, open a recent invoice. Confirm that dates, amounts, and account balances match what you expect.
Step 6: Transfer Templates and Additional Files
Custom invoice templates, letter templates, and memorized reports are stored separately from the company file. To transfer them:
- Custom templates — in QuickBooks on the old computer: Lists → Templates → select each template → Export. Import on the new computer: Lists → Templates → Import
- Memorized transactions — these are stored inside the company file and transfer automatically with the .QBW or .QBB file
- Custom reports — memorized reports are also stored in the company file and transfer automatically
- Printer settings — may need to be reconfigured on the new computer as printer drivers differ
Troubleshooting Common Transfer Issues
| Problem | Cause | Fix |
|---|---|---|
| Activation fails on new computer | Too many activations used | Call Intuit activation support or contact ParagonSoftwares — we can help resolve activation count issues |
| Company file won’t open | Version mismatch | Ensure same version installed, or allow upgrade prompt |
| Data looks incomplete after restore | Older backup used | Check backup date — use the most recent .QBB file |
| Verify Data reports errors | Minor data corruption | Run Rebuild Data (File → Utilities → Rebuild Data) |
| Custom templates missing | Templates not transferred | Export from old PC and import on new PC via Lists → Templates |
| “H202” or network error | Multi-user config not set up on new PC | Run QuickBooks File Doctor tool or reconfigure multi-user hosting |
Need a Fresh QuickBooks Desktop License for Your New Computer?
If you are setting up a new computer and need a genuine QuickBooks Desktop 2024 license, ParagonSoftwares delivers in 2–4 hours.
Browse Available Licenses →